官網 FFmpeg
|
1 |
A complete, cross-platform solution to record, convert and stream audio and video. |
--
视频的镜像
hflip video filter
hflip实现对视频的水平翻转。语法如下:
-vf hflip
--
直播
影音檔案使用在 RTMP 直播上
一般檔案因為具備「Duration 播放長度」的資訊,直接將檔案丟給直播 RTMP Server 或產生
|
1 |
ffmpeg -i 1.mp3 -f flv rtmp://192.168.0.245:1935/live/8ec0569c9ce12a7e34965a51bd22a917?token=111 |
:
|
1 2 |
[flv @ 0000000002ed9720] Failed to update header with correct duration. [flv @ 0000000002ed9720] Failed to update header with correct filesize. |
類似這類的錯誤。
只要加上 -re 參數即可
|
1 |
ffmpeg -re -i 1.mp3 -f flv rtmp://192.168.0.245:1935/live/8ec0569c9ce12a7e34965a51bd22a917?token=111 |
輸入為 M3U8 HLS 訊號源
|
1 |
ffmpeg -re -i "http://radio-hichannel.cdn.hinet.net/live/pool/hich-ra000036/ra-hls/index.m3u8?token1=FR_LhHZVEdS-ALKN0JgVKA&token2=8OsqolCZTvmzTxiwWuv37A&expire1=1464846811&expire2=1464875611" -ar 44100 -f flv rtmp://192.168.0.245:1935/live/8ec0569c9ce12a7e34965a51bd22a917?token=111 |
m3u8 檔案範例
|
1 2 3 4 5 6 7 8 9 10 11 12 13 |
#EXTM3U #EXT-X-VERSION:3 #EXT-X-ALLOW-CACHE:NO #EXT-X-TARGETDURATION:4 #EXT-X-MEDIA-SEQUENCE:1 #EXTINF: 30, ./1.mp3 #EXTINF: 30, ./2.mp3 #EXTINF: 30, ./3.mp3 #EXTINF: 30, ./4.mp3 |
--
將 MP4 儲存為 AES 加密及如何播放
|
1 2 3 4 |
cd /tmp openssl rand 16 > file.key echo file.key >> file.keyinfo openssl rand -hex 16 >> file.keyinfo |
file.key 為一二進制檔案
|
1 |
E2 33 1A FE 91 9E 92 73 1C 54 B5 0C A7 7B 18 5D |
file.keyinfo 為文字檔
|
1 2 3 |
/tmp/aes/file.key file.key 9b3a896551864dcca9ec9784ba8160bb |
使用 ffmpeg 將 MP4 檔案轉換為 HLS
|
1 |
ffmpeg -i a.mp4 -hls_time 10 -hls_list_size 0 -hls_key_info_file file.keyinfo 1.m3u8 |
單機播放
可以使用 ffplay
|
1 |
ffplay 1.m3u8 |
在 m3u8 設定的 AES-128 URI 路徑必須存在加密的 file.key
|
1 2 3 4 5 6 7 8 9 10 11 12 13 |
#EXTM3U #EXT-X-VERSION:3 #EXT-X-TARGETDURATION:17 #EXT-X-MEDIA-SEQUENCE:0 #EXT-X-KEY:METHOD=AES-128,URI="./file.key",IV=0x9b3a896551864dcca9ec9784ba8160bb #EXTINF:10.000000, 10.ts #EXTINF:10.000000, 11.ts #EXTINF:10.000000, 12.ts : : |
如此即可播放,否則取得下載 TS 檔案也無法播放
網頁播放
--
使用 frei0r 濾鏡
- 画像をドット絵風の低画質に変換するTwitter Bot「低画質」を作った – razokulover publog
- ffmpeg でドット絵風の低画質に変換する
- ffmpeg windows: how to run ffmpeg -i input -filter:v frei0r=pixeliz0r=0.02:0.02 output
--
加速、減速
將聲音加速
|
1 |
ffmpeg -i input.mp3 -filter:a "atempo=2.0" -vn output.mp3 |
--
Flash 轉檔
|
1 2 |
ffmpeg -y -i A1.wmv -f image2 -s 150x100 -ss 52 A1.jpg ffmpeg -y -i A1.wmv -qmin 6 -qmax 10 -r 25 -b 250K -s 480x320 A1.flv |
- -qscale 1 : 取代 -qmin & -qmax ,使用此參數將忽略 -b 設定,至少需要設定到 4 相近顏色才可辨識
--
圖檔轉影片
檔案 001.jpg 002.jpg 003.jpg ..... ,編號一定要從 1 開始
|
1 |
ffmpeg -i %03d.jpg test.avi |
--
影片轉圖檔 - 固定時間間隔
|
1 |
ffmpeg -i Produce.mp4 -r 0.5 -s 640x360 %3d.jpg |
- -r 0.5 2 秒轉一張圖檔
- -s 640x360 圖檔尺寸
--
影片轉成 MP3
|
1 |
ffmpeg -i target.mp4 -vn target.mp3 |
使用 -vn 參數將影像取消後,輸出格式設定為 .mp3 即可
--
在 Windows 環境下,一次處理整個資料夾
此批次檔可以將 input 資料夾內所有檔案,經過 ffmpeg 轉成 mp4 格式並儲存到 output 資料夾
參考
Convert.BAT
|
1 2 3 4 |
chcp 65001 for /F "delims=\" %%1 in ('dir/b input\*.*') do ( bin\ffmpeg -i "input\%%~1" -vcodec libx264 -y "output\%%~n1.mp4" ) |
- chcp 65001 : 切換到 UTF-8 code page,在批次檔內執行才可正常取得檔名
- "delims=\" : 使用 \ 當成換行符號,因為檔案名稱不得使用此字元,才可以正常取得完整檔名
下圖為實際的檔案架構,將檔案丟進 input 資料夾內,雙擊批次檔即可執行,或是自行執行命令提示字元程式,使用指令執行。如此的好處是執行錯誤時可以看到錯誤代碼,或是加上 pause 暫停指令在批次檔最下方也可以
--
收聽、儲存網路電台
mms:// 需要修改成 mmst://
|
1 |
ffplay mmst://live.fm937.tw/fm937 |
--
WebCam
FreeBSD
|
1 2 3 4 |
# webcamd -d ugen1.3 -i 0 -v 0 & # chmod 666 /dev/video0 # pwcview # ffmpeg -f x11grab -i :0.0 out.mp4 |
Windows
DirectShow – FFmpeg (備份)
在 Windows 的電腦上,FFmpeg 使用 DirectShow 功能。
|
1 |
>ffmpeg -list_devices true -f dshow -i dummy |
ffplay 播放
|
1 |
>ffplay -f dshow -s 1280x720 -i video="HD Pro Webcam C920" |
|
1 |
>ffmpeg -f dshow -list_options true -i video="HD Pro Webcam C920" |
預設影片尺寸為 640x480
|
1 |
>ffmpeg -f dshow -vcodec h264 -i video="HD Pro Webcam C920":audio="麥克風 (HD Pro6 Webcam C920)" -y a.mp4 |
|
1 |
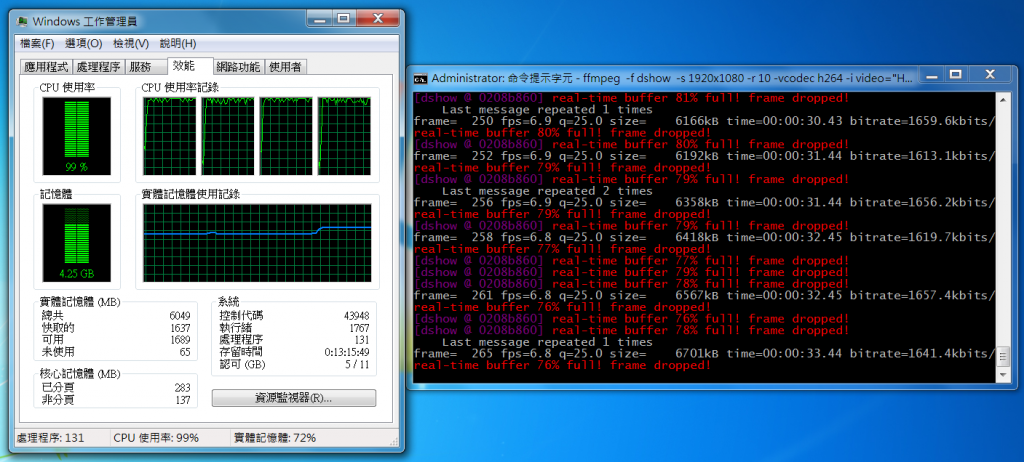
>ffmpeg -f dshow -s 1920x1080 -vcodec h264 -i video="HD Pro Webcam C920" -y a.mp4 |
一邊轉檔一邊監看
|
1 |
>ffmpeg -f dshow -s 1920x1080 -vcodec h264 -i video="HD Pro Webcam C920" -y a.mp4 -f mpegts - | ffplay -analyzeduration 10 -f mpegts - |
--
3,435 total views, 1 views today


chcp 65001
for /F "delims=\C:\Users\vincentphlin\Desktop\ffmpeg\bin\" %%1 in ('dir/b input\*.*') do (
bin\ffmpeg -i "input\%%~1.avi" -c:v libx264 -preset veryslow -qp 0 "output\%%~n1.mp4"
)
請問大大我哪邊錯了? 可以幫我修正一下嗎?我是把這段指令變批次檔執行
很抱歉內,都是寫給自己看的,所以寫的很簡單
已經把實際檔案存放的架構更新網頁了,一開始就跟著我的方式做就可以了,等掌握了每個指令、參數的作用再做必要的修改