For Windows 前置動作
- 下載 adb Tools,解壓縮後就可以使用
SDK Platform Tools Release Notes - 開啟 Android 手機 USB 偵錯模式
設定 → 開發人員選項 → USB 偵錯 - 取消 SD 卡 MTP
- 接上手機,安裝 Android USB Driver
--
adb 使用大全
--
電池狀態
|
1 2 3 4 5 6 7 8 9 10 11 12 13 14 15 16 |
>adb -s YED7N16622000518 shell dumpsys battery Current Battery Service state: AC powered: false USB powered: true Wireless powered: false Max charging current: 0 Max charging voltage: 0 Charge counter: 0 status: 5 health: 2 present: true level: 100 scale: 100 voltage: 4302 temperature: 290 technology: Li-poly |
--
驗證連線是否正常
|
1 2 3 4 |
adb devices List of devices attached F1AZB704R410 device |
如果發生錯誤,檢查是否 USB 連線設定為掛載 SD 卡,取消後重新測試。
--
撥號
|
1 |
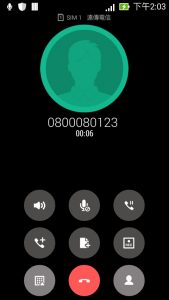
adb shell am start -a android.intent.action.CALL -d tel:0800080123 |
成功執行的話,就會看到手機進入撥號畫面
--
撥號後的狀態
|
1 |
> adb shell dumpsys telephony.registry |
mCallState=0 #0表示待機狀態、1表示來電未接聽狀態、2表示電話佔線狀態
列表
|
1 |
> adb shell dumpsys -l |
--
按鍵
在有鍵盤輸入的狀態下,數字 1
|
1 |
adb shell input keyevent 8 |
連續按鍵
|
1 |
adb shell input keyevent 7 8 9 10 |
--
Tap 觸控
觸控必須知道 X, Y 座標才能定位,所以第一步就是確定手機的螢幕解析度
可以使用很多方法取得螢幕解析度
|
1 2 3 4 |
adb shell wm size Physical size: 1080x1920 |
|
1 2 3 4 5 6 7 |
adb shell dumpsys window displays WINDOW MANAGER DISPLAY CONTENTS (dumpsys window displays) Display: mDisplayId=0 init=480x854 240dpi cur=480x854 app=480x854 rng=480x442-854x816 layoutNeeded=false |
根據當前螢幕,按下 50, 750 的位置, XY 座標是以左上角為 0,0
|
1 |
adb shell input tap 50 750 |
--
應用場景:撥號後根據步驟提示自動輸入
|
1 2 3 |
adb shell am start -a android.intent.action.CALL -d tel:0800080123 adb shell input tap 100 820 adb shell input keyevent 8 |
根據手機不同,有些不須要先開啟鍵盤即可輸入 keyevent ,例如 HTC 。這支 ASUS Zenfone C 是需要先開啟鍵盤才行
--
瀏覽檔案
瀏覽 SD 卡
|
1 2 3 4 5 6 7 8 9 10 11 12 13 14 15 16 17 18 19 |
adb shell ls sdcard/ ASUS Android AsusSoundRecorder AsusSuperNote Browser_Savedfiles Cardboard DCIM DemoContent.txt Download DownloadAndUploadCache Images_cache Mob Music Pictures : : |
--
將所有擷圖複製到電腦上
|
1 |
adb pull /sdcard/Screenshots/ |
ASUS Zenfone C 錄音檔路徑
|
1 |
adb pull /storage/MicroSD/callrecordings/ |
--
刪除檔案
|
1 |
adb shell rm /sdcard/Screenshots/*.* |
--
通話狀態
|
1 2 3 4 5 6 7 8 |
adb shell dumpsys telephony.registry last known state: mCallstate=0 mCallIncomingNumber= : : |
- mCallstate=0 不是通話狀態
- mCallstate=2 通話狀態中
--
截圖、投影及除錯
|
1 2 |
>adb devices >adb shell screenrecord --output-format=h264 - | ffplay - |
顯示
|
1 |
/system/bin/sh: screenrecord: not found |
錯誤就用
|
1 |
>adb shell ls /system/bin/ |
列出是否有 screenrecord 指令,通常是沒有才會出現這個錯誤,這時只能用 screencap 了
|
1 |
C:\bin\adb>adb shell screencap -p /sdcard/s1.png & adb pull /sdcard/s1.png |
如果需要模仿投影就無限迴圈跑就好了
|
1 2 3 4 5 |
@echo off cls :start adb shell screencap -p /sdcard/s1.png & adb pull /sdcard/s1.png goto start |
--
4,907 total views, 1 views today

thanks for sharing