在完整的應用,ESP8266 除了上傳監測器數據,還需要接收主機送過來的繼電器控制訊號,必須建立即時、可控的雙向通訊機制
為了簡約開發使用 TCP Text 通訊 JSON 當成通訊格式,最後加上 SSL 加密就完成規劃
此階段只做到 Text 雙向通訊完結
--
TCP Server
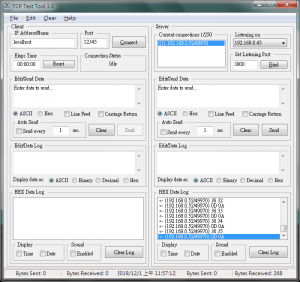
這裡還是使用多年以前使用的 TCP Server Tool 來擔任 Server 角色,等 Client 開發完成再自行架設

--
ESP8266 TCP Client
ESP8266 使用 TCP Socket 做通訊沒有想像中的困難,反而是相當的容易
|
1 2 3 4 5 6 7 8 9 10 11 12 13 14 15 16 17 18 19 20 21 22 23 24 25 26 27 28 29 30 31 32 33 34 35 36 |
#include <ESP8266WiFi.h> // const char* ssid = "ssid name"; const char* password = "ssid password"; // Socket Server const char* host = "192.168.0.45"; const int port = 3000; int i = 0; WiFiClient client; void setup() { Serial.begin(115200); Serial.print( "Start..." ); WiFi.mode(WIFI_STA); WiFi.begin(ssid, password); while (WiFi.status() != WL_CONNECTED) { delay(500); Serial.println("."); } } void loop() { if (!client.connected()) { client.connect(host, port); client.println("connected..."); } client.println(i++); delay(1000); } |
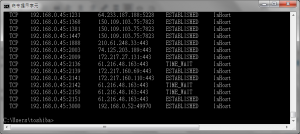
使用 netstat -nt 指令查看確定網路通訊狀態正常
--
TCP Server 推送
ESP8266 Arduino
|
1 2 3 4 5 6 7 8 9 10 11 12 13 14 15 16 17 18 19 20 21 22 23 24 25 26 27 28 29 30 31 32 33 34 35 36 37 38 39 |
#include <ESP8266WiFi.h> // const char* ssid = "ssid name"; const char* password = "ssid password"; // Socket Server const char* host = "192.168.0.45"; const int port = 3000; int i = 0; WiFiClient client; void setup() { Serial.begin(115200); Serial.print( "Start..." ); WiFi.mode(WIFI_STA); WiFi.begin(ssid, password); while (WiFi.status() != WL_CONNECTED) { delay(500); Serial.println("."); } } void loop() { // if (!client.connected()) { client.connect(host, port); client.println("connected..."); } String Control = client.readStringUntil('\n'); Serial.println(Control); delay(1000); } |
- client.readStringUntil('\n'); 從 client 接收字串,使用 \n 換行區隔
- Serial.println(Control); 將收到的字串輸出看看
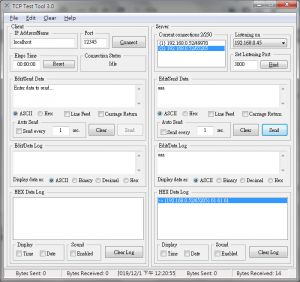
從 TCP Server Tool 發送訊息,會自動送出換行,其他軟體請注意設定

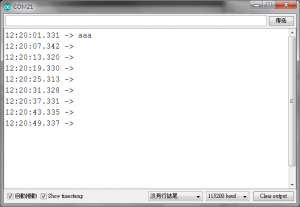
在串列監視就可以收到訊息

--
5,602 total views, 1 views today
